Skip to main content Skip to page footer

Technical information

Sensys

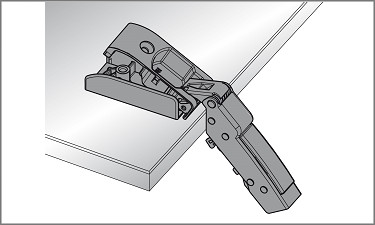
Sensys, the hinge technology with integrated Silent System for even more convenience when closing hinged doors. With its uniquely wide automatic closing angle, Sensys closes the door almost on its own. Innovative, smooth, gentle, quiet. Convenience boost in award-winning design from Hettich.

Installation

The manuals show you how easy the installation is.

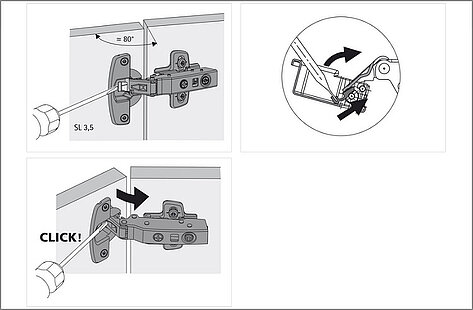
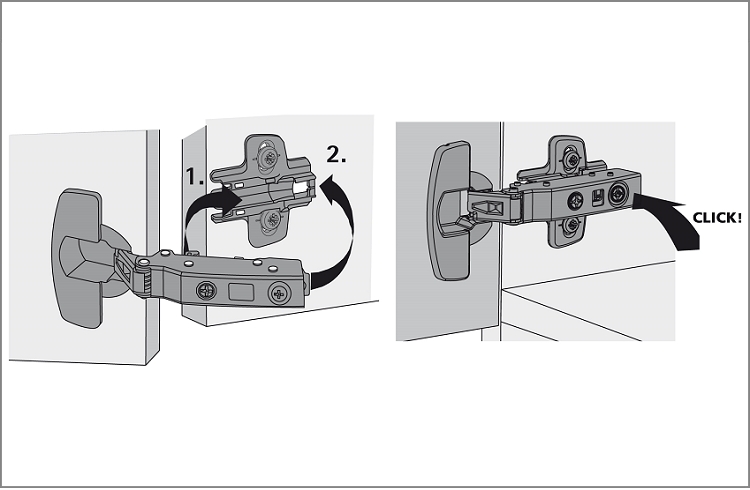
  • Installation & removal

    • Installation

      Video, MOVINGIMAGE, 22 B

    • Installation

      Drawing, JPG, 49 KB

    • Installation instructions for high doors

      Assembly instructions , PDF, 4 MB

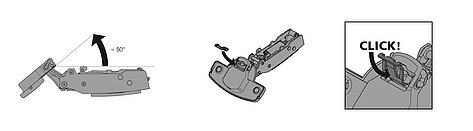
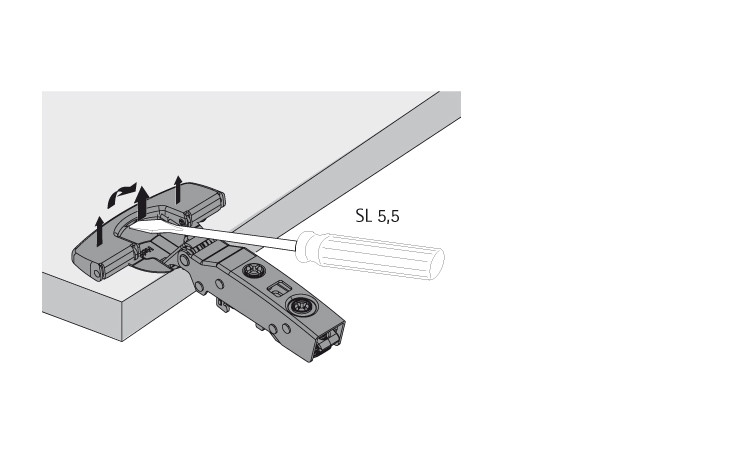
    • Removal

      Video, MOVINGIMAGE, 22 B

    • Removal

      Drawing, JPG, 31 KB

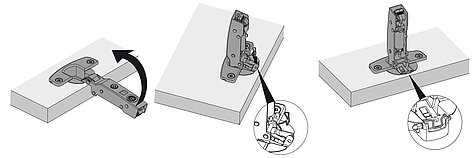
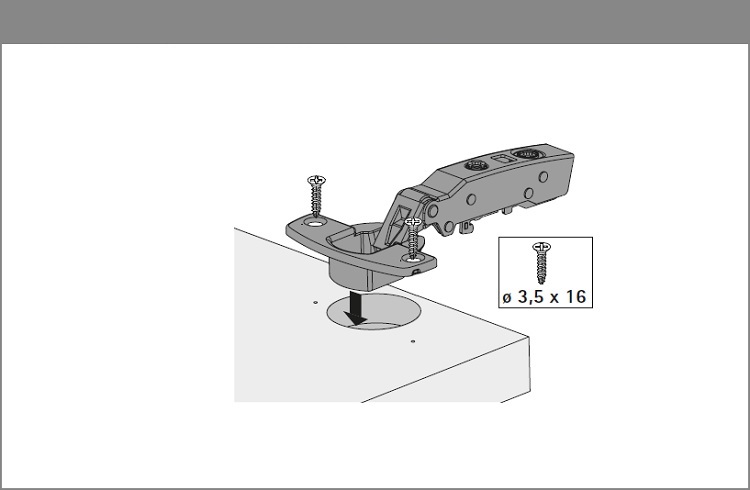
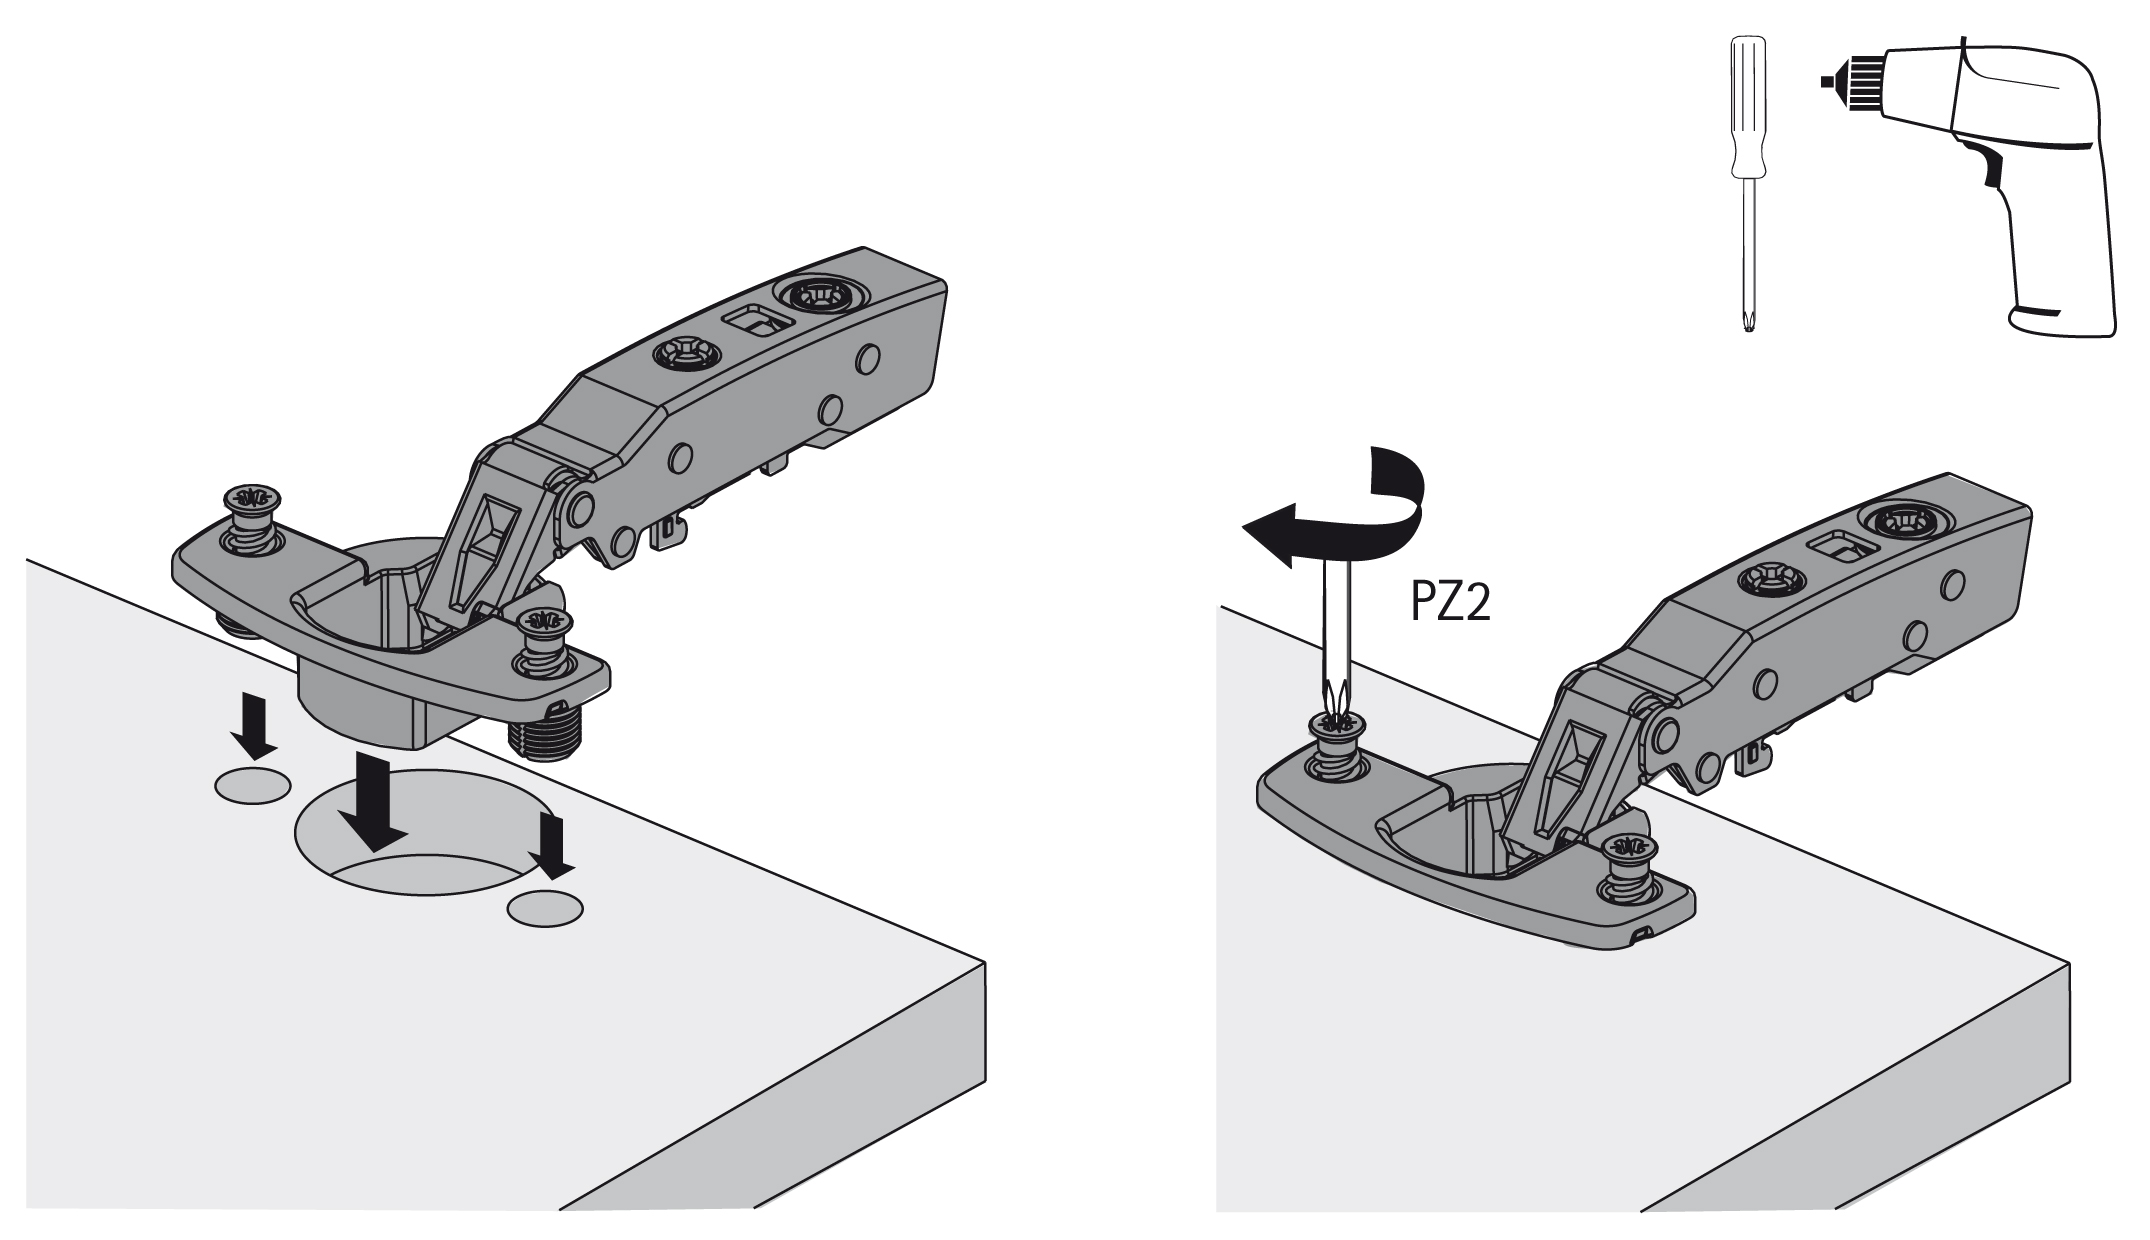
  • Cup installation for screwing on

    • Cup installation for screwing on

      Video, MOVINGIMAGE, 22 B

    • Sensys_Topfmontage-zum-Anschrauben.jpg

      JPG, 27 KB

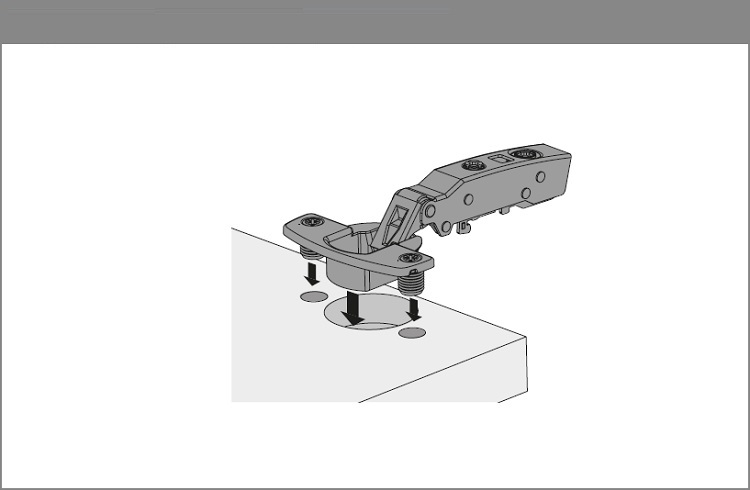
  • Cup installation for pressing in

    • Cup installation for pressing in

      Video, MOVINGIMAGE, 22 B

    • Cup installation for pressing in

      Drawing, JPG, 25 KB

  • Flash cup installation

    • Flash cup installation

      Video, MOVINGIMAGE, 22 B

    • Flash cup installation

      Drawing, JPG, 46 KB

  • Fix cup assembly

  • Cup installation with premounted expanding sockets

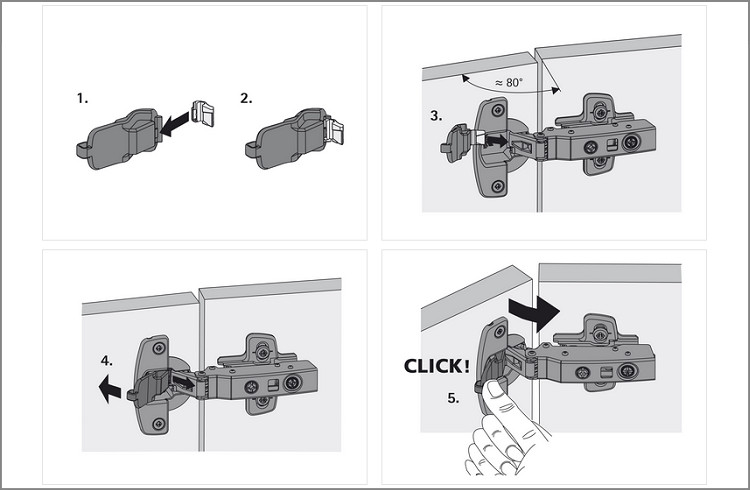
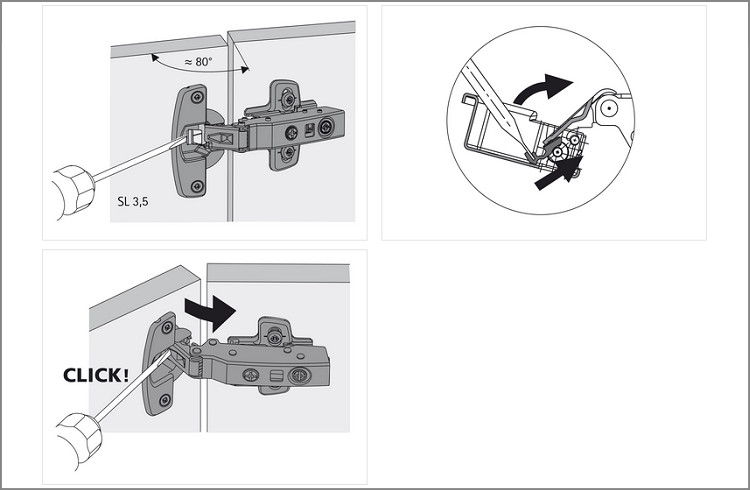
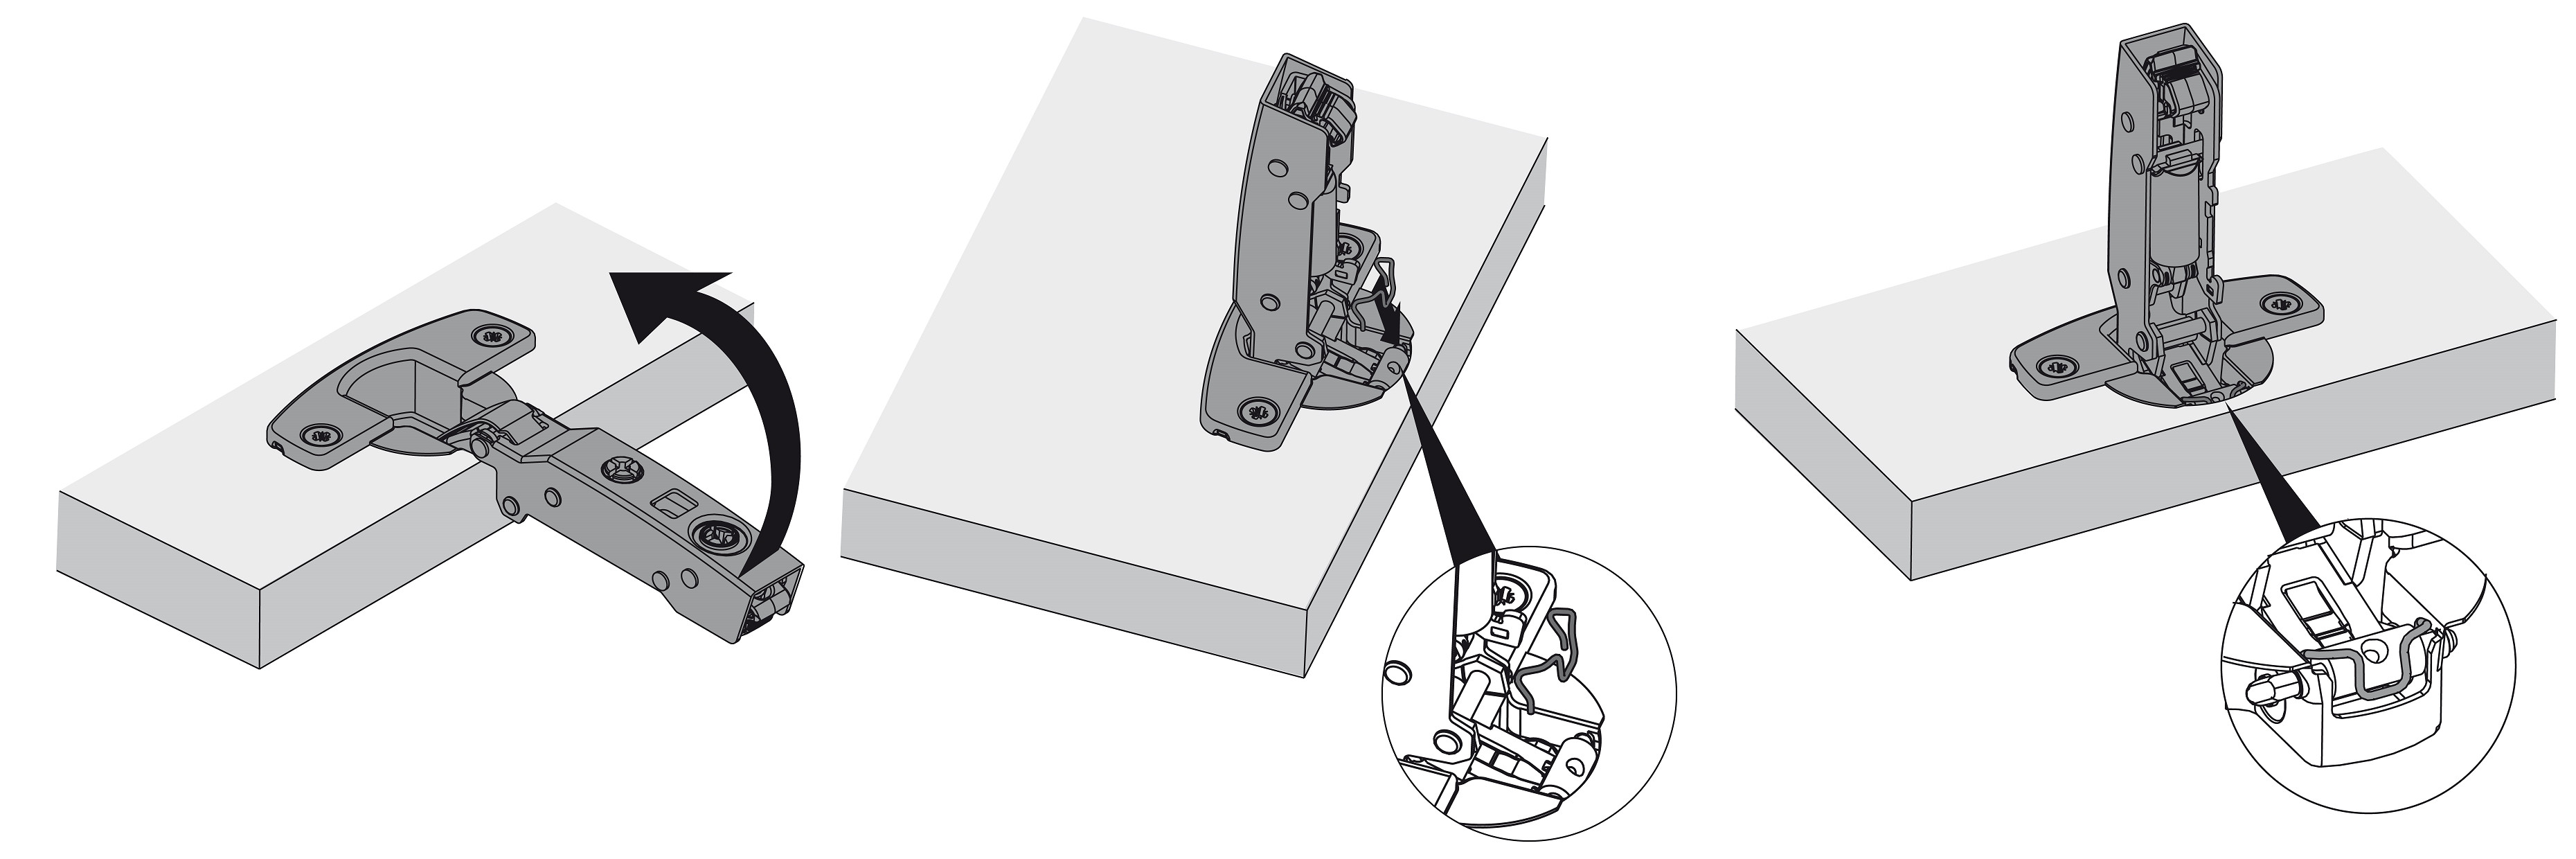
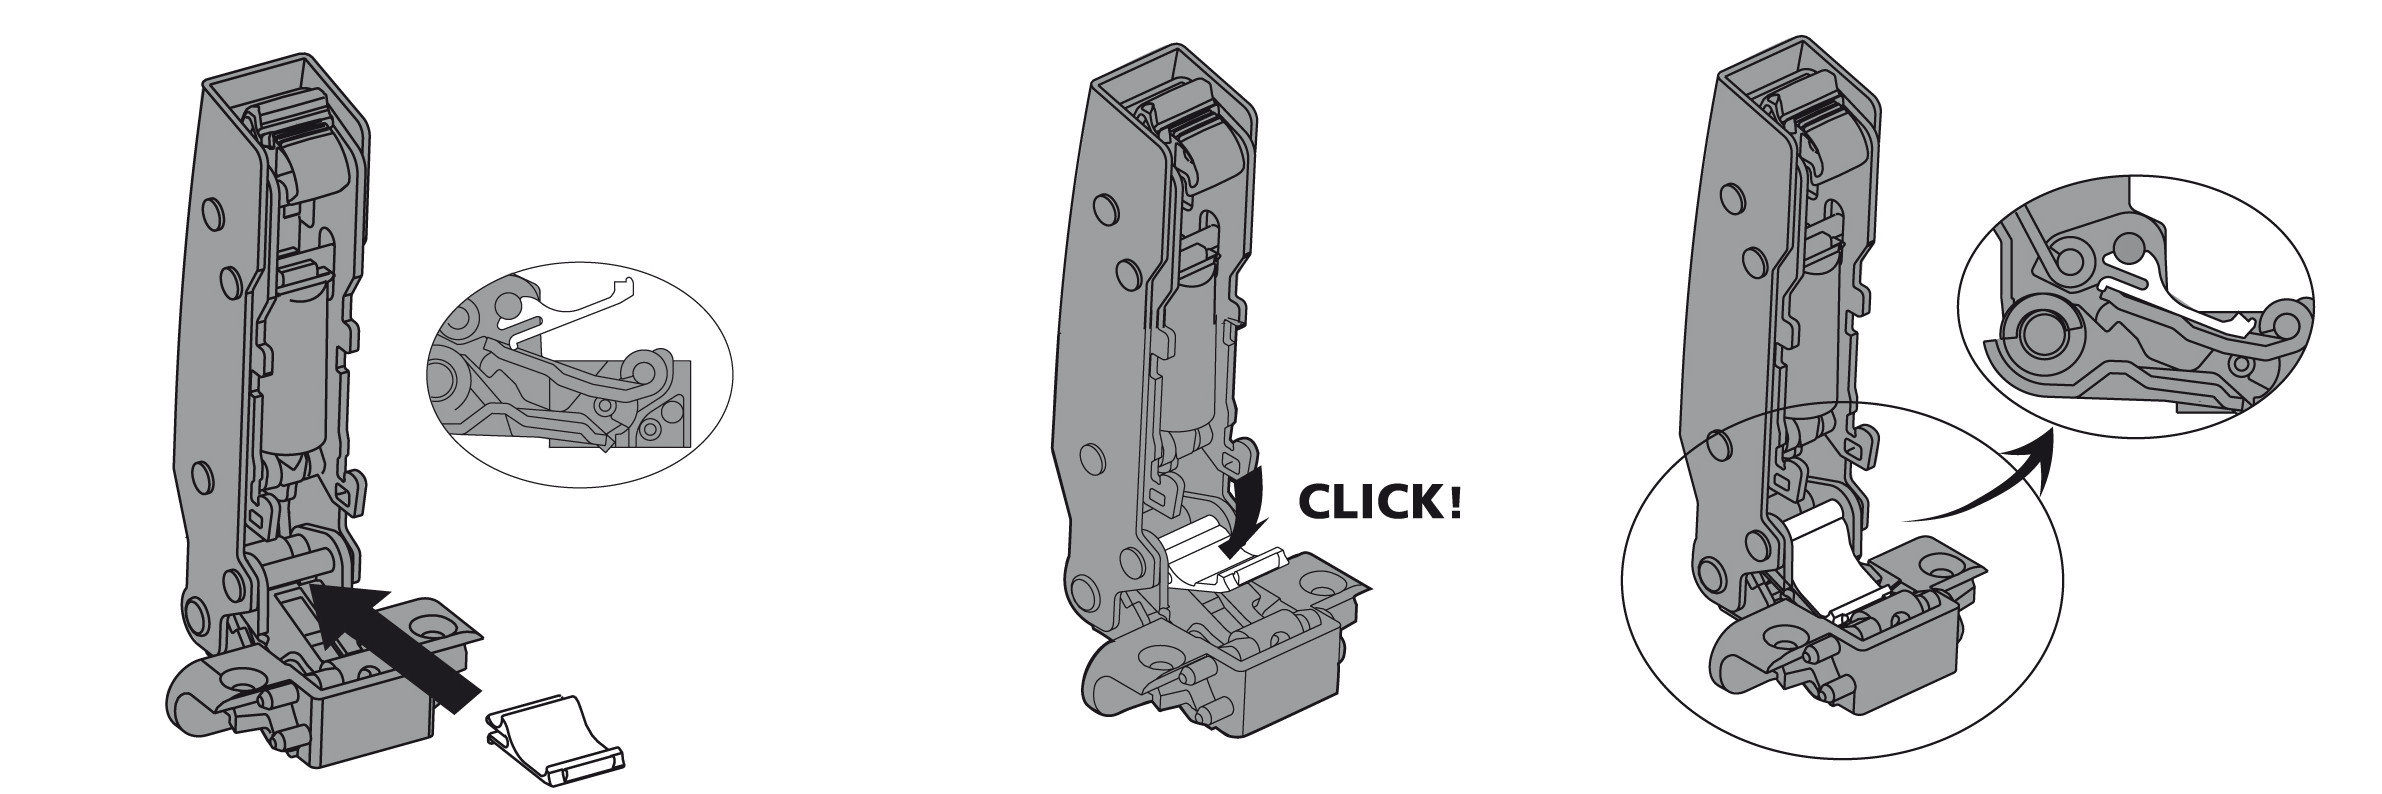
  • Installing soft-opening

    For Sensys wide angle hinges

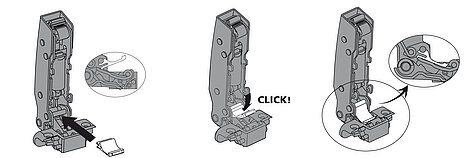
    • Installing soft-opening

      Drawing, JPG, 22 KB

  • Installing the parallel adapters on adapter plate

    • Installing the parallel adapters on adapter plate

      Drawing, JPG, 50 KB

  • Installing the angle adapters

    • Angle adapter

      Assembly instructions, PDF, 3 MB

  • Sensys for glass applications

    • Housing for glue mounting (PU2)

      Assembly instructions, PDF, 3 MB

    • Aid for positioning (housing for glue mounting)

      Assembly instructions, PDF, 329 KB

    • Adapter for glue mounting (PU2)

      Assembly instructions, PDF, 4 MB

    • Adapter for glue mounting (PU50)

      Assembly instructions, PDF, 4 MB

    • Aid for positioning (adapter for glue mounting)

      Assembly instructions, PDF, 403 KB

    • Mounting plate for glue mounting (PU2)

      Assembly instructions, PDF, 6 MB

    • Mounting plate for glue mounting (PU50)

      Assembly instructions, PDF, 8 MB

    • Aid for positioning (mounting plate for glue mounting)

      Assembly instructions, PDF, 376 KB

    • Cup assembly

      Drawing, JPG, 20 KB

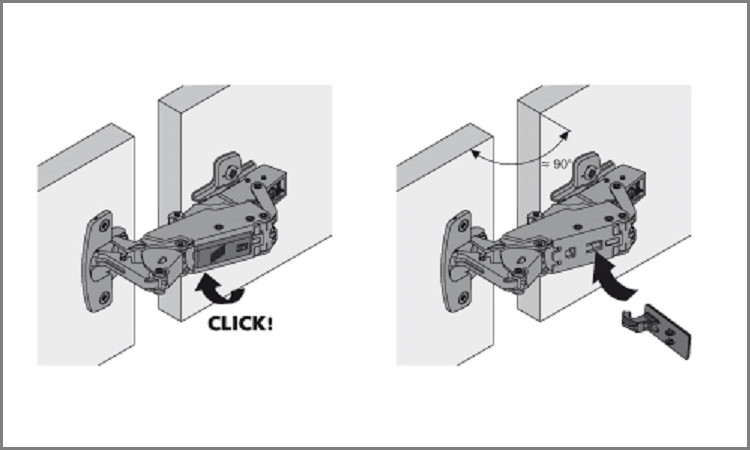
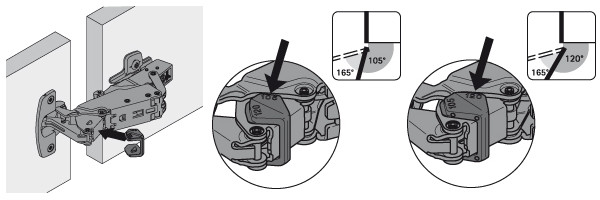
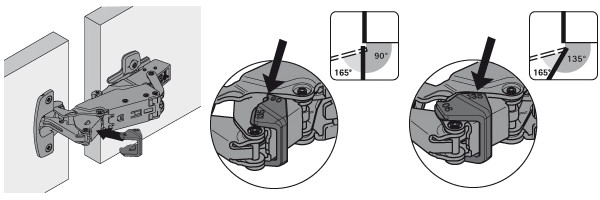
Installing the opening angle limiters

The manuals show you how easy the installation of the opening angle limiter is.

  • For Sensys 110° hinges

  • For Sensys thin door hinges

  • For Sensys thick door hinges

  • For Sensys wide angle hinge

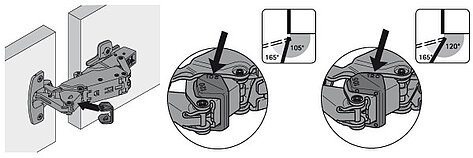
    • 105° / 120° opening angle limiter

      Drawing, JPG, 29 KB

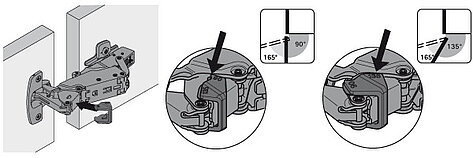
    • 90° / 135° opening angle limiter

      Drawing, JPG, 28 KB

  • For Senys aluminium frame hinges

    • Opening angle limiter

      Drawing, JPG, 204 KB

  • For Sensys angle hinges

Adjustment

Select the desired setup.

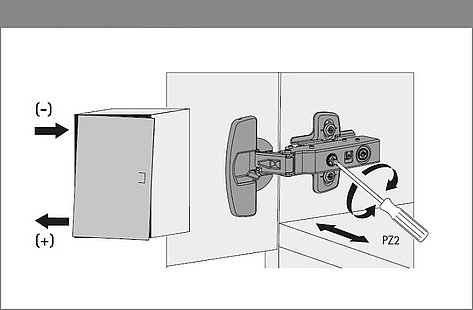
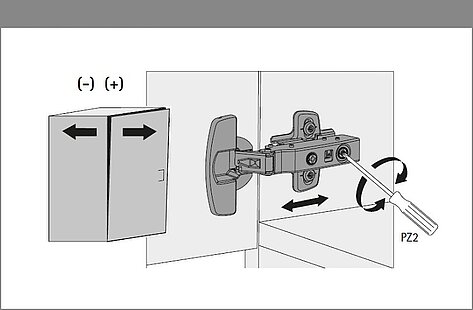
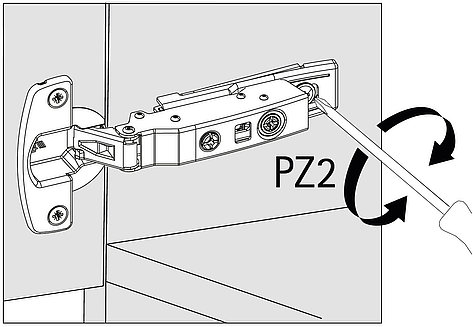
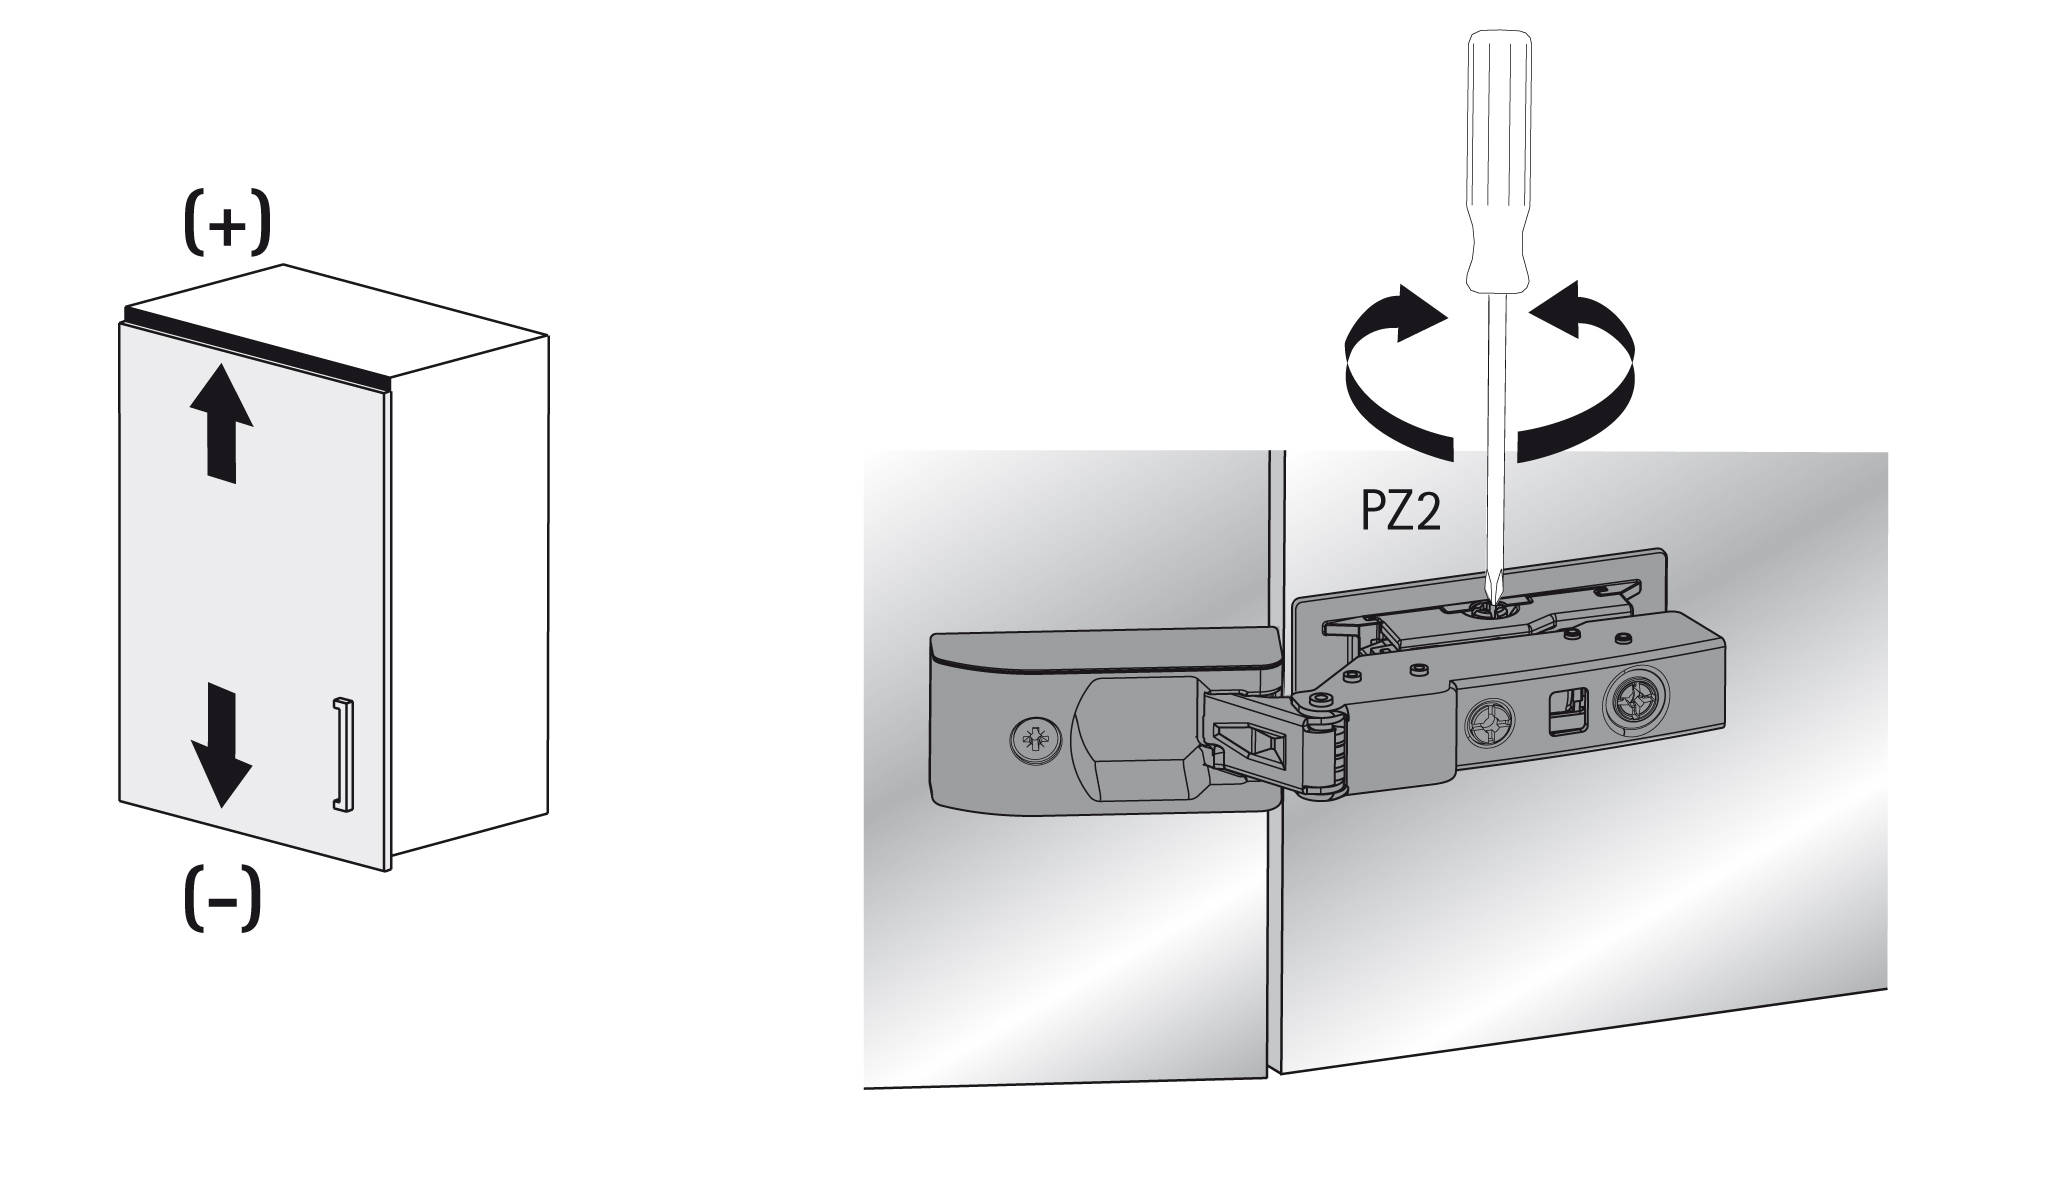
  • Overlay adjustment

    • Overlay adjustment

      Video, MOVINGIMAGE, 22 B

    • Overlay adjustment

      Drawing, JPG, 46 KB

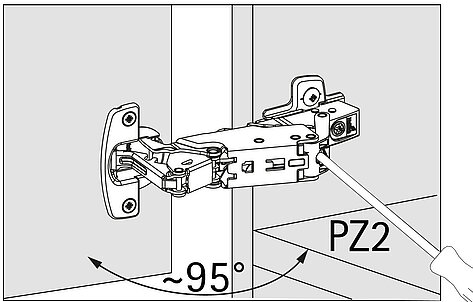
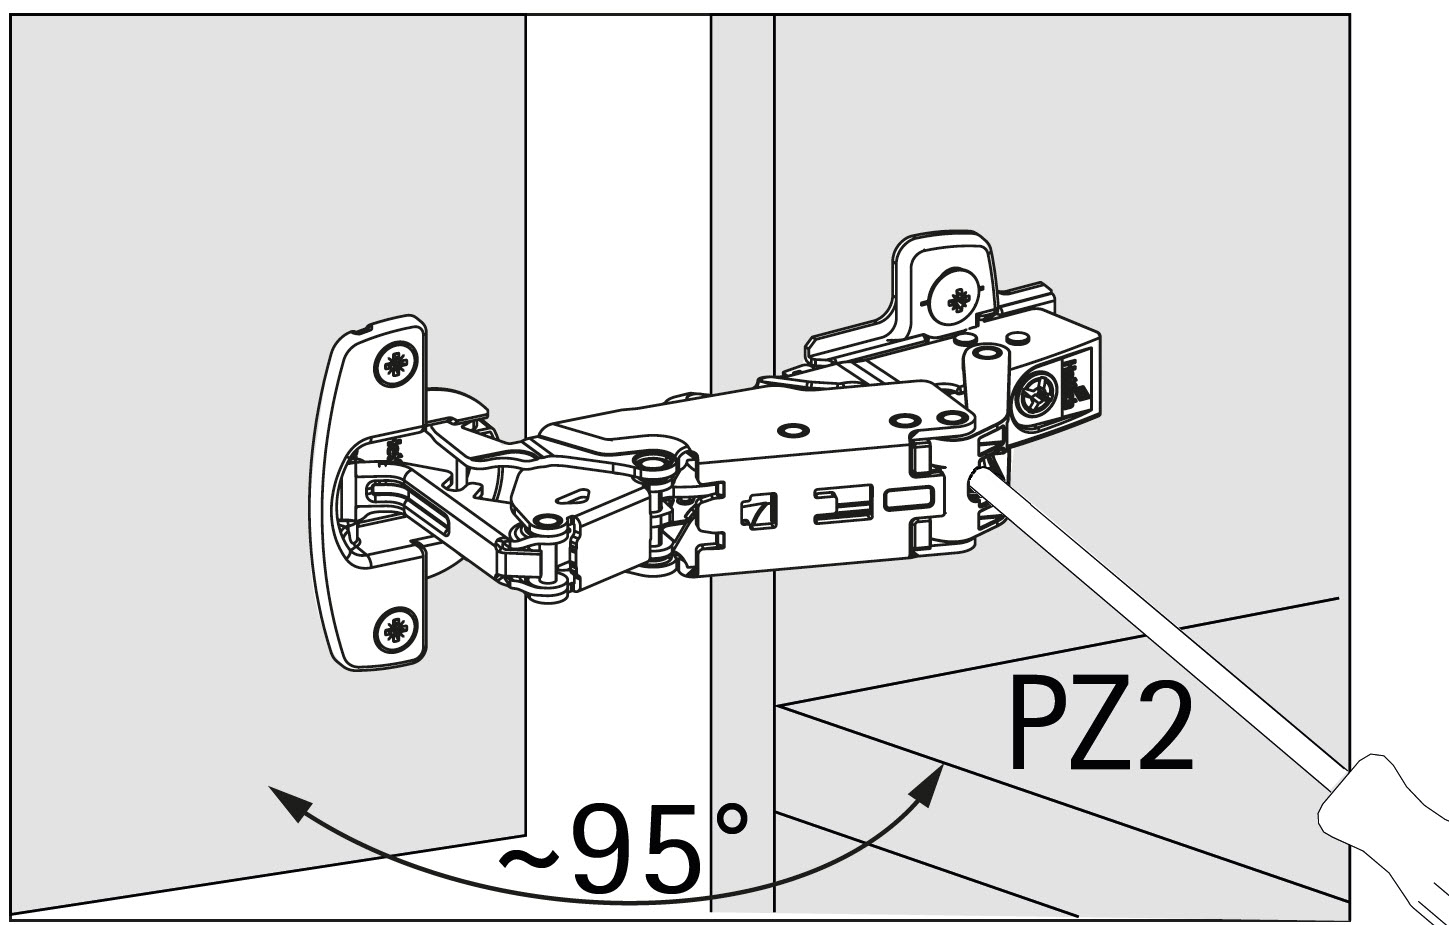
    • Wide-angle hinge overlay adjustment

      Drawing, JPG, 142 KB

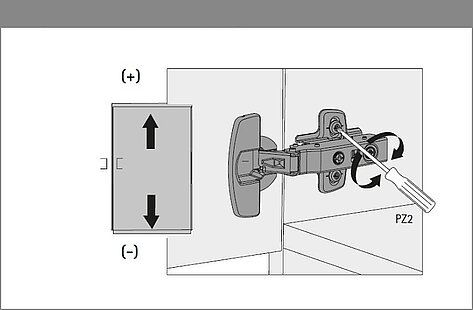
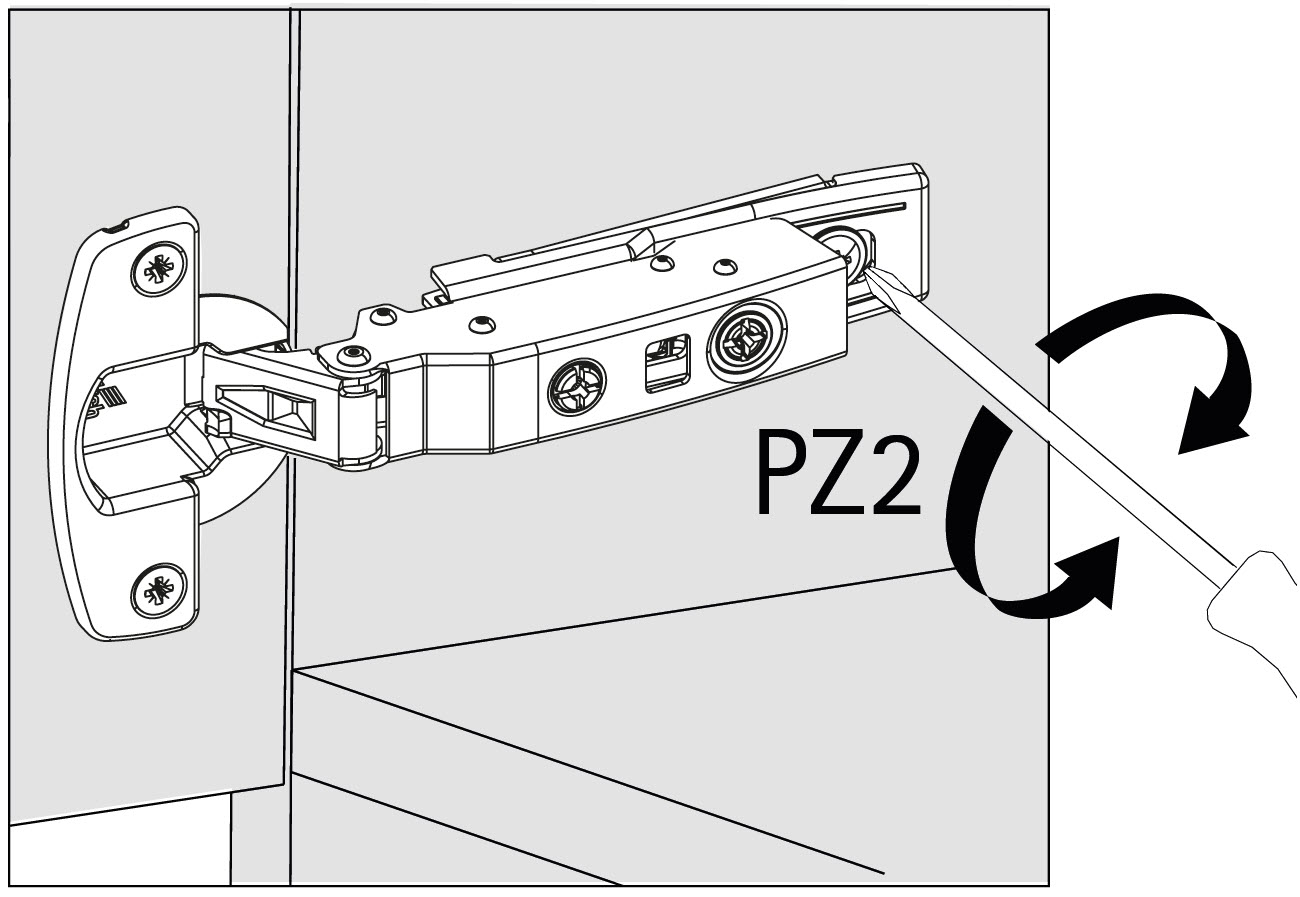
  • Depth adjustment

    • Depth adjustment

      Video, MOVINGIMAGE, 22 B

    • Depth adjustment

      Drawing, JPG, 45 KB

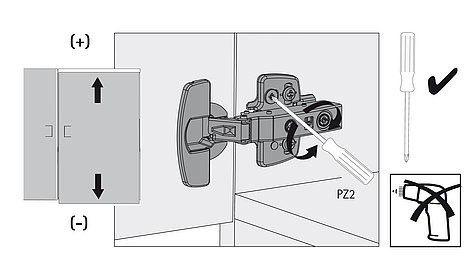
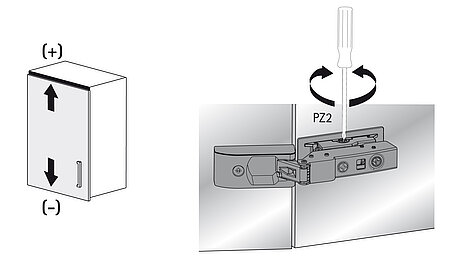
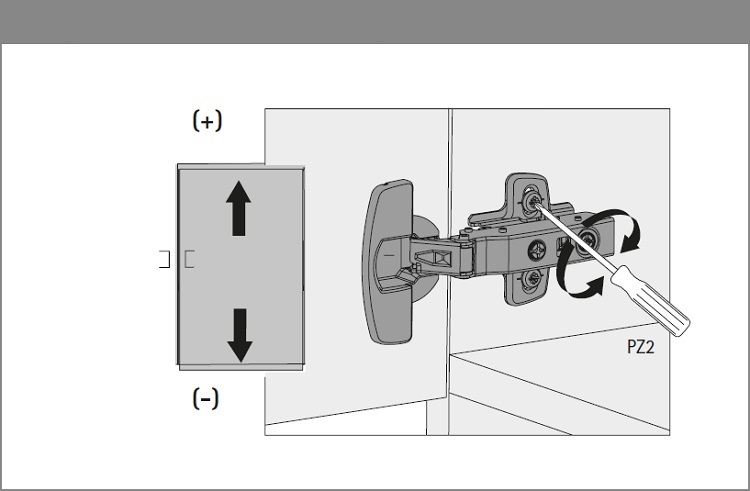
  • Height adjustment - mounting plate with oblong hole

    • Mounting plate with oblong hole

      Video, MOVINGIMAGE, 22 B

    • Mounting plate with oblong hole

      Drawing, JPG, 12 KB

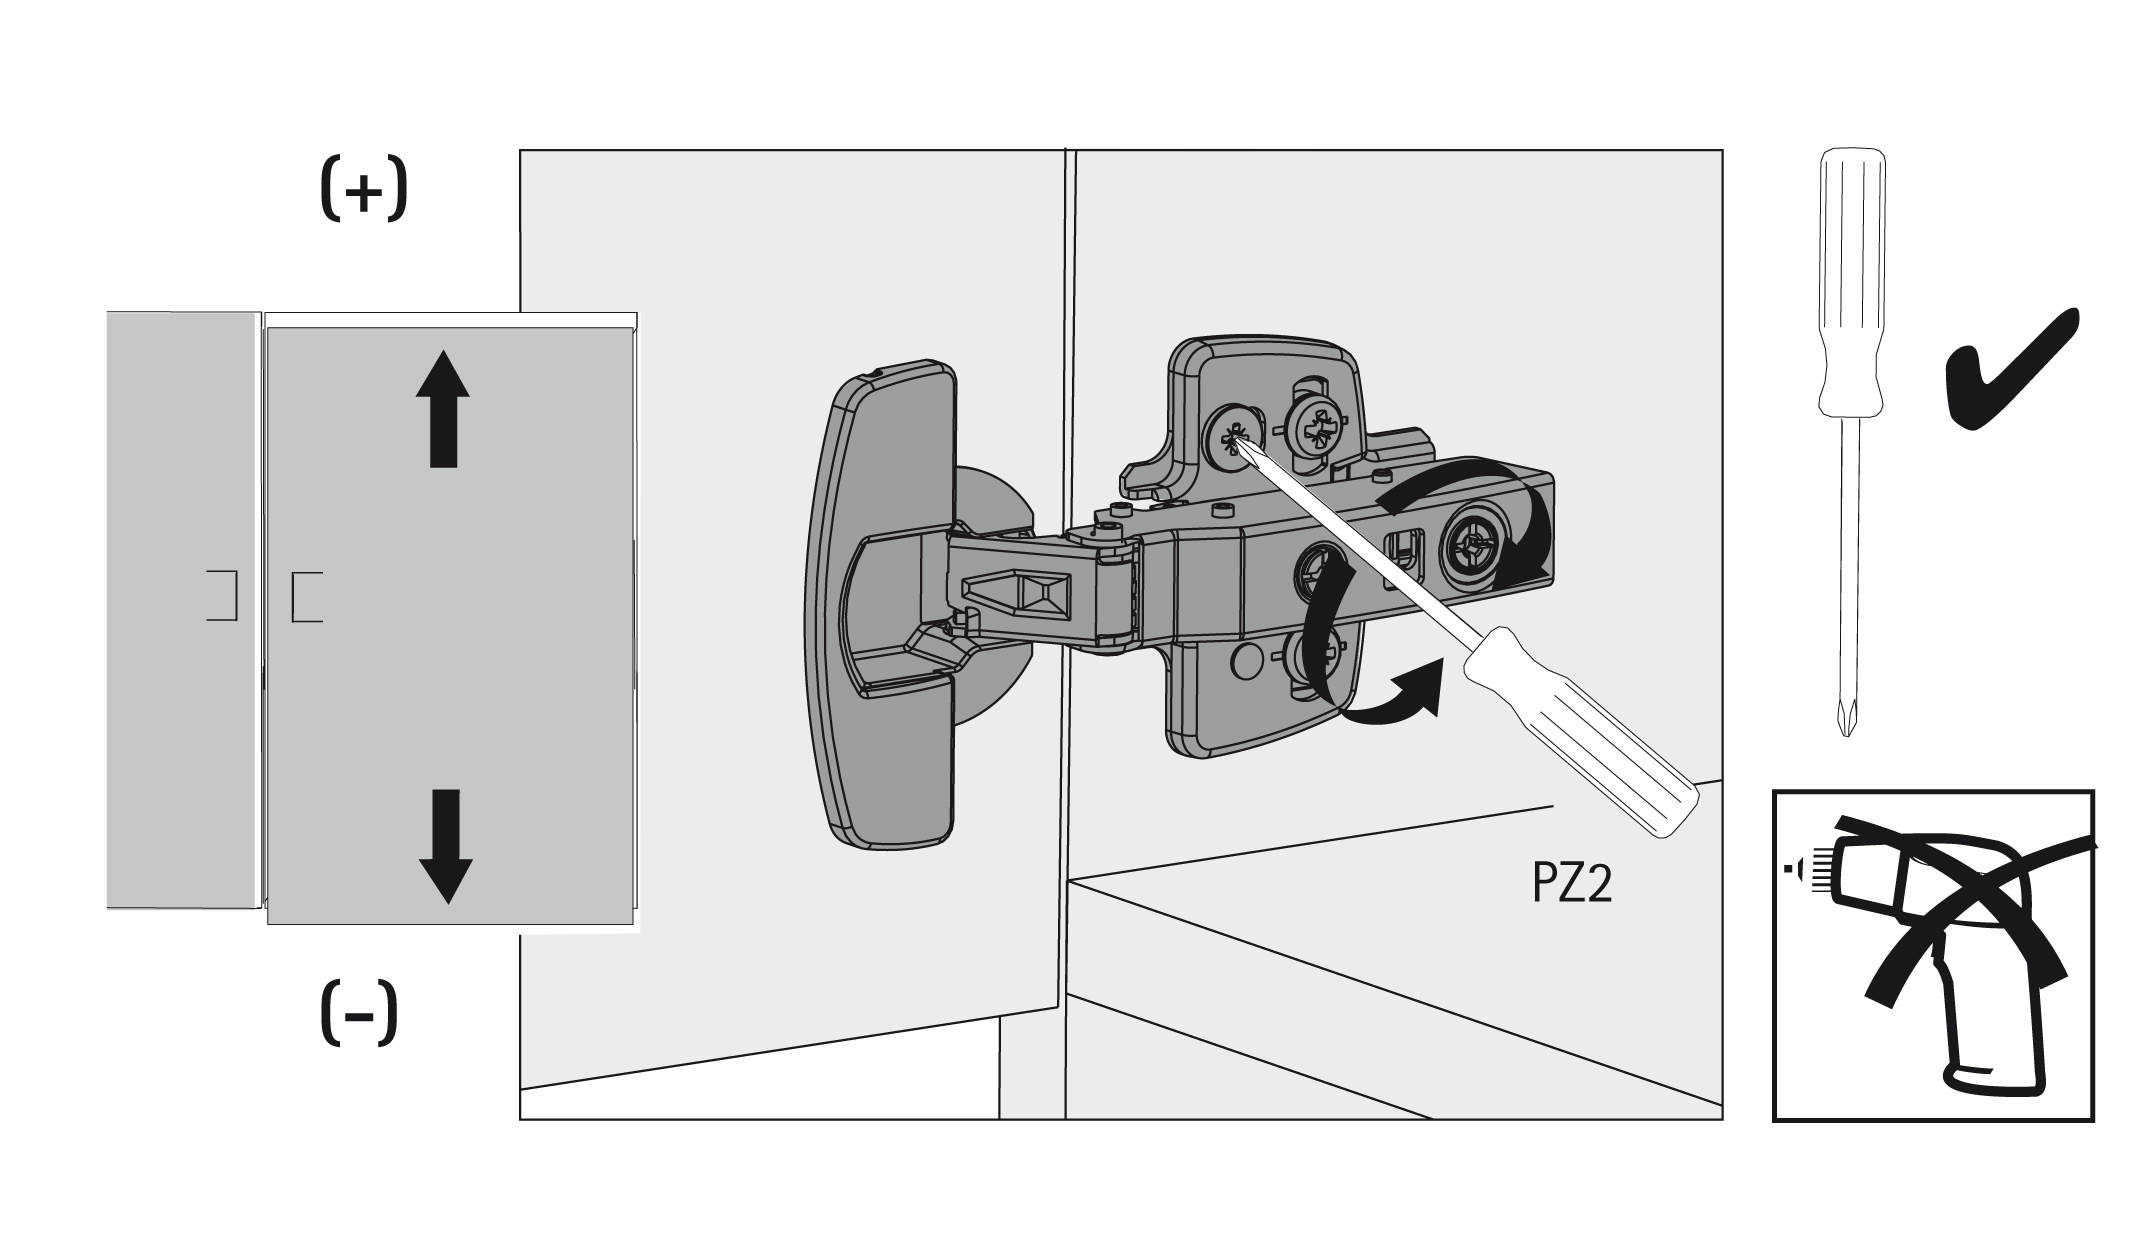
  • Height adjustment - mounting plate with direct adjustment

    • Mounting plate with direct adjustment

      Video, MOVINGIMAGE, 22 B

    • Cross mounting plate with direct adjustment

      Drawing, JPG, 13 KB

    • Linear mounting plate with direct adjustment

      Drawing, JPG, 127 KB

  • Height adjustment - mounting plate for glue mounting

    • Sensys mounting plate for glue mounting

      Drawing, JPG, 372 KB

Number of hinges per door - Sensys

Door width, height and weight as well as the material quality of the door are decisive factors determining the number of hinges required.


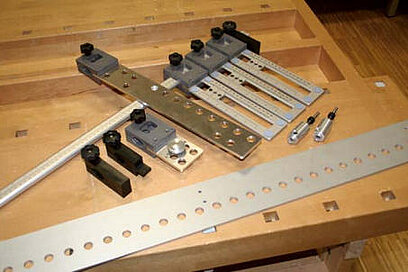
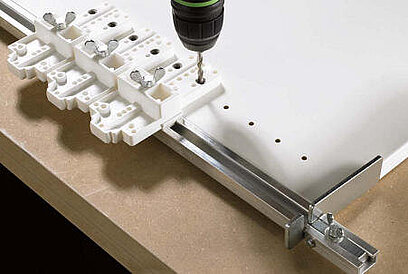
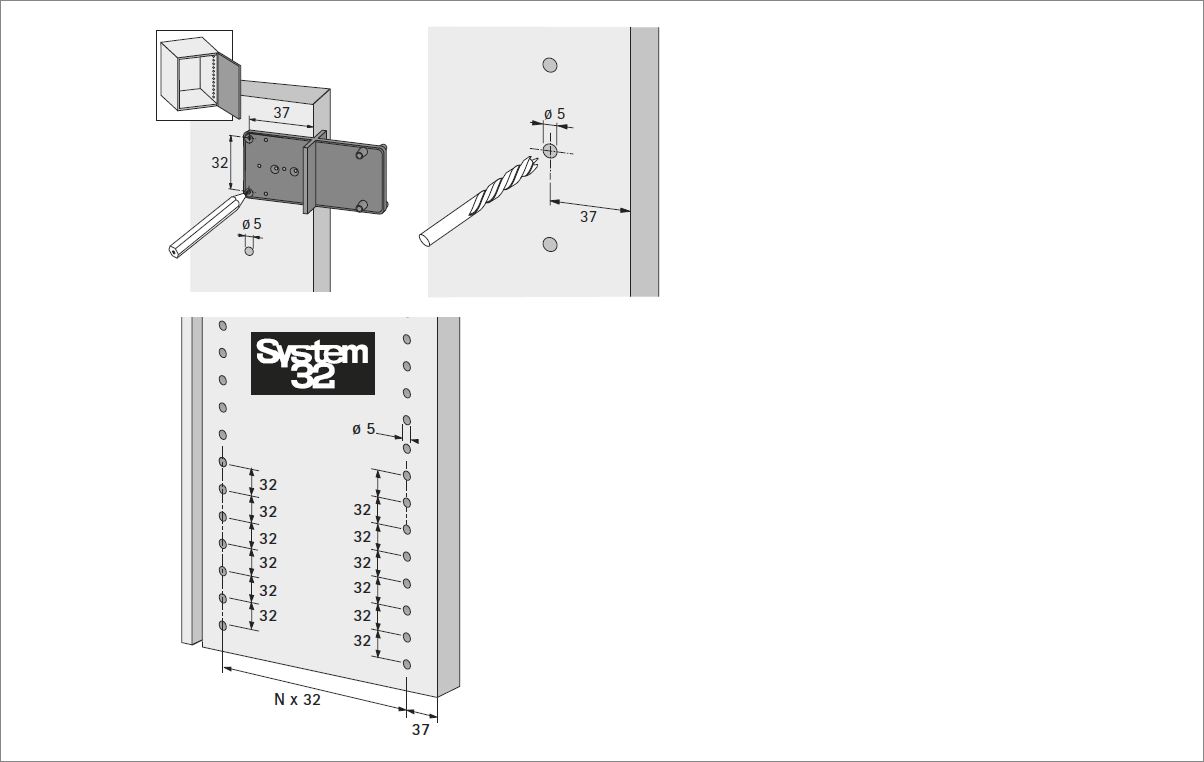
Simple drilling jigs for quickly installing any part

Holes for fittings can be drilled with absolute precision with solutions from Hettich. Fittings can then be screwed to furniture without any major effort. Drilling patterns can easily be transferred to the workpiece. This saves machining time and simplifies installation. Drilling jigs can be used in the workshop and on the construction site. Hettich offers the right installation aid for every fitting.


  • Accura

    Ruler drilling jig with various modular system drilling templates and sleeve drills


    Suitable for installing


    • fittings in System 32
    • Hinges
    • Mounting plates
    • runners
    • Handles and knobs


    To the catalogue

    • Using Accura drilling jig with hinge drilling template

      Video, MOVINGIMAGE, 22 B

  • Exakta

    Ruler drilling jig with versatile drill body.


    Suitable for installing


    • Connecting fittings Rastex 15 and VB 18 / 19 / 20 / 21, 35, 36
    • hinges
    • Mounting plates
    • Handles


    To the catalogue

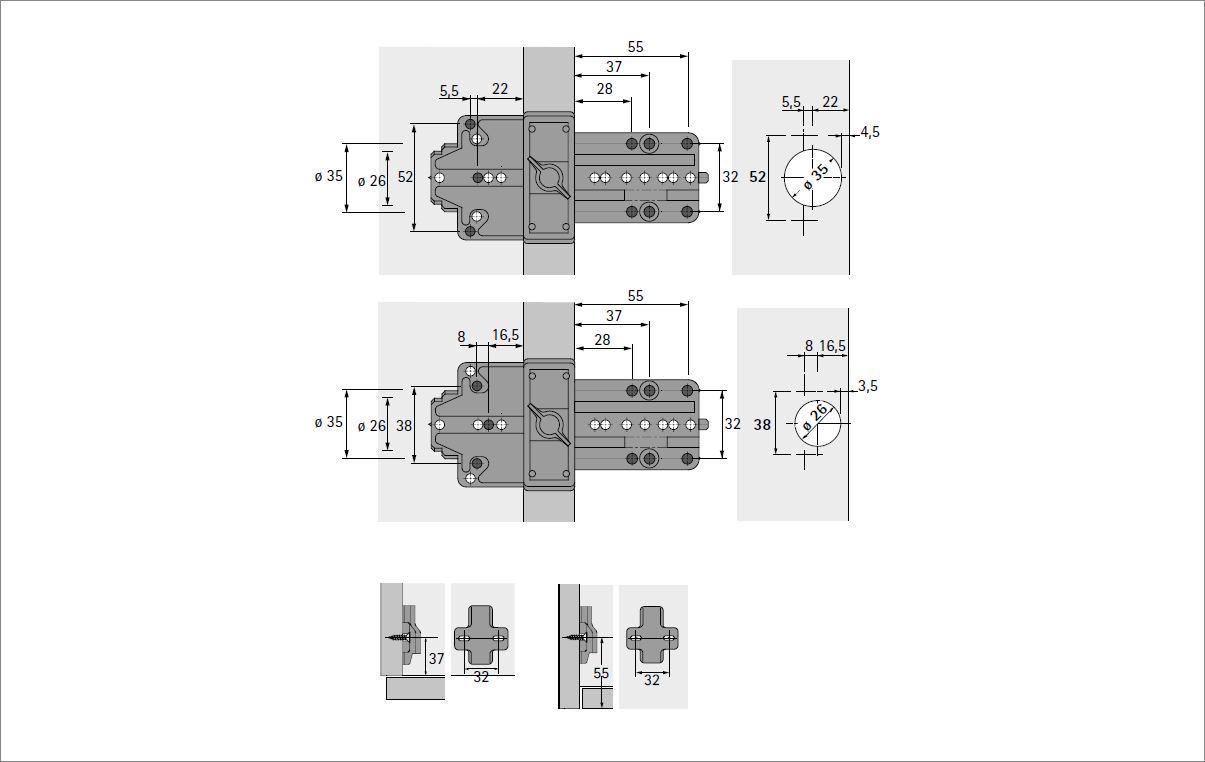
    • Hole marking position for hinges

      Drawing, JPG, 64 KB

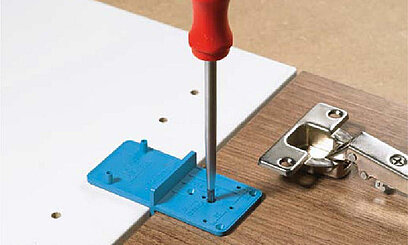
  • MultiBlue

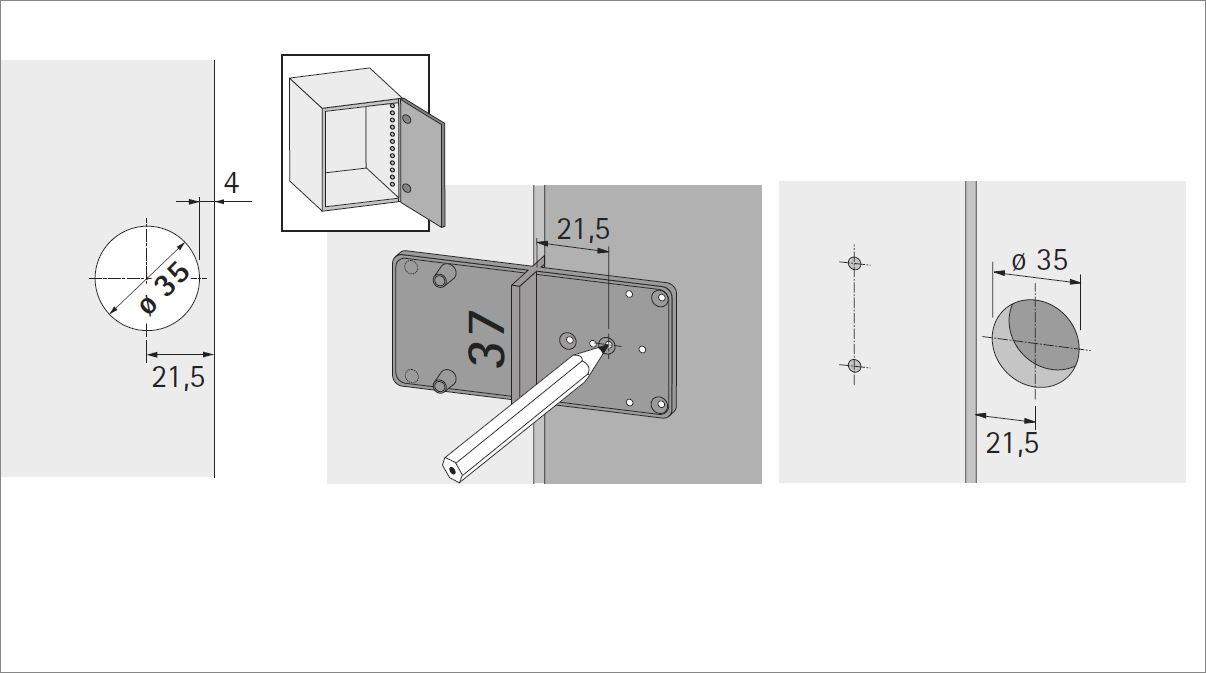
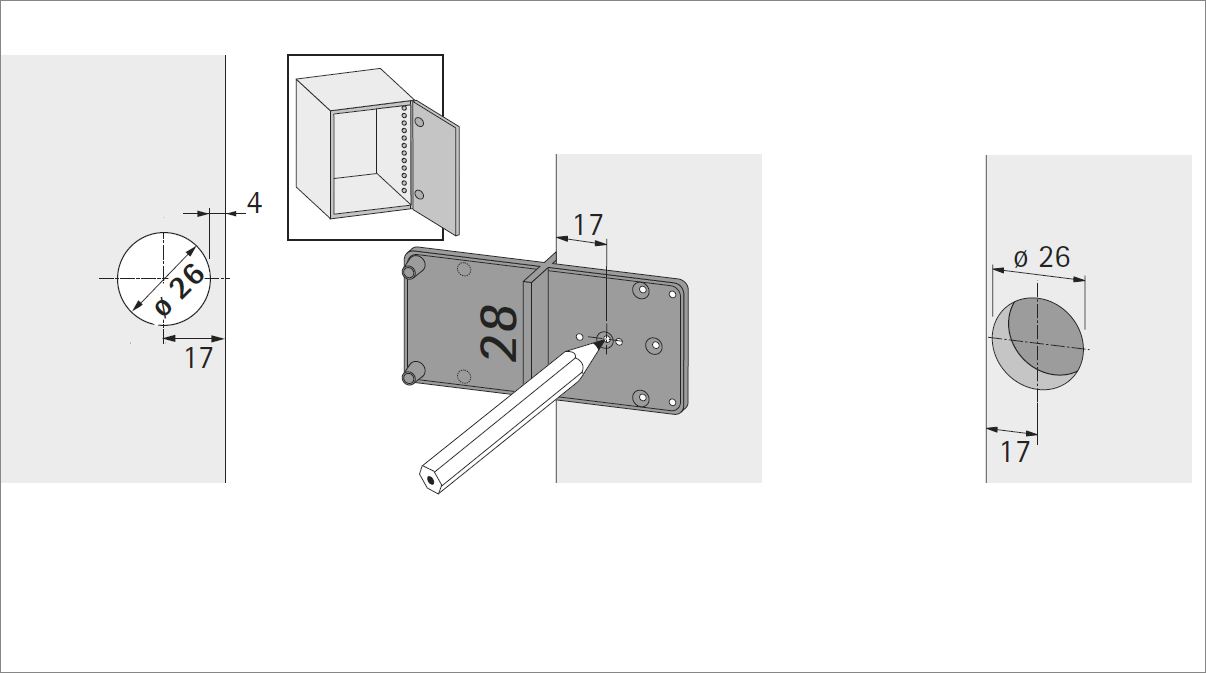
    The double sided MultiBlue hole marking jig is used to mark a hole centre for


    • Drill holes in System 32, e.g. for mounting plates, dowels, shelf supports
    • 35 and 26 mm ø cup drillings with 4 mm cup distance for hinges
    • 25 mm ø drill holes for Rastex 25 connecting fittings
    • 20 mm ø drill holes for VB 35 and VB 135 connecting fittings


    To the catalogue

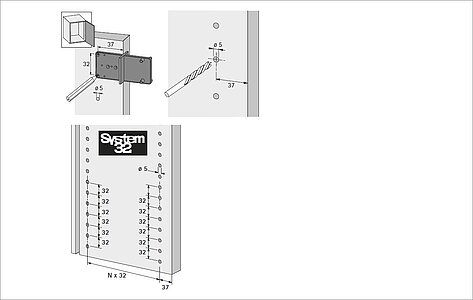
    • Drilling patterns

      Drawing, JPG, 53 KB

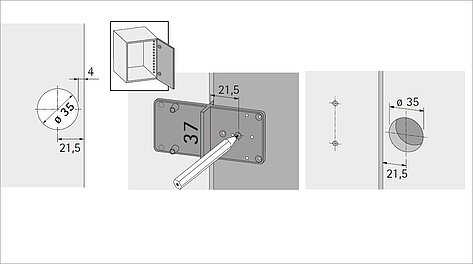
    • Hole marking position for 35 mm cup dia.

      Drawing, JPG, 47 KB

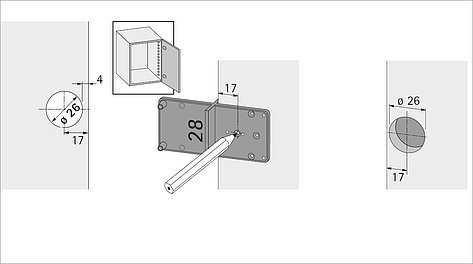
    • Hole marking position for 26 mm cup dia.
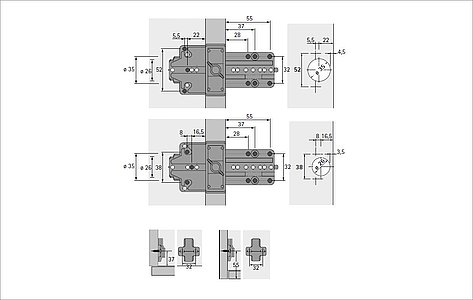
      Drawing, JPG, 44 KB